
Client Portal Tutorial
The Client Portal of the Go Full Frame system has a lot of features. And so you may require some help along the way.
Video Tutorial
We have created a lengthy video covering as many features as well can. When the system is updated next, we will update the video as well.
I know we hate change, and even more so hate extra steps or complications. But this system has a lot to offer, though still giving the freedom of minimal usage as well. So let me highlight some key things with this system, and why it’s better than the past system.
By setting up the account, you can take advantage of things like the property website and flyer builder tool for free and have all your branding info incorporated into them automatically.
Instead of asking me what we have on the schedule for you, and when, and what you have me doing, or if I even received the request, you can log in and see everything I have for you. You can see what is scheduled for when, and what services you have me doing and can easily modify the services or the job details on your own without having to call or text me.
The job request feature is much more reliable than that of my website or app, and you see right in front of you when your job is submitted into the system so that you know it’s received.
The system delivers you both branded and unbranded options, which I’m not able to do very easily on my own apart from this system.
You get a easier downloading method. Instead of dealing with Box, you receive a simple email with links to download all your files as either MLS ready sizes, or as printable files. I have only bothered sending MLS sized files unless requested otherwise.
It houses all delivered digital products in one system, and automatically incorporates them into the property website that is free with every job. So whether it be the photos, or the virtual tours, or drone videos, or the new slideshows (another feature with this system), you can access all of them from this system simply by viewing a job and going to the appropriate tab option.
You now have a fast a free flyer builder tool. You can choose from a number of templates, which will automatically populate with your branding and property information. And then you can drag your photos in from the job photos. It only takes a minute to do and then you can have it save you out a printable version that you can take and have printed where ever you want. Plus it has the QR code on it that points to the property website.
The property website actually has both a branded version and a MLS version that can be added to the MLS. So you can have a stand alone property website linked right in to the MLS that can hold all the photos instead of the MLS limit. Plus it has statistics as well.
You now receive automated email notifications about the job. When it’s created, when it’s been modified, and when it’s complete. And in an upcoming version of the system it will include email reminders to remind you of an upcoming job before hand.
There’s a lot to this, but it’s not hard once you’ve set yourself up and gone thru it one time. I’m trying to up my game and give everyone more for their money. I really think everyone will love this way more in the end. Scheduling, delivery, invoicing, and more are all built into this system. Or if you want, you can bypass many of the features and just have it be a delivery system only, but I promise you won’t stay that way if you do.

Create your account
Open and save the following link: https://tennesseephotocompany.gofullframe.com
This is your login page, but also has the SignUp option.
Click on that to create an account. .

Setup your account
You’ll be taken to a page where you can put in all of your info. This is will be necessary if you want to take advantage of all the great features available to you that we’ll cover. If you’re a broker, or have a team of other agents under you, then be sure and check yourself as a project administrator. You can create your own code. Then when anyone under a broker or team leader puts your info and code in when setting up their own profiles, you’ll be able to access their projects on their behalf. When done, click Save & Continue. As you click Save & Continue you’ll be taken thru a list on the right side of the screen under Your Progress. You can skip any of these at any time and return to them later to finish setting them up. When you reach the Notes section, you’ll then see the button say Create Your Account. Once you do that, you’re ready to go!
Your Dashboard
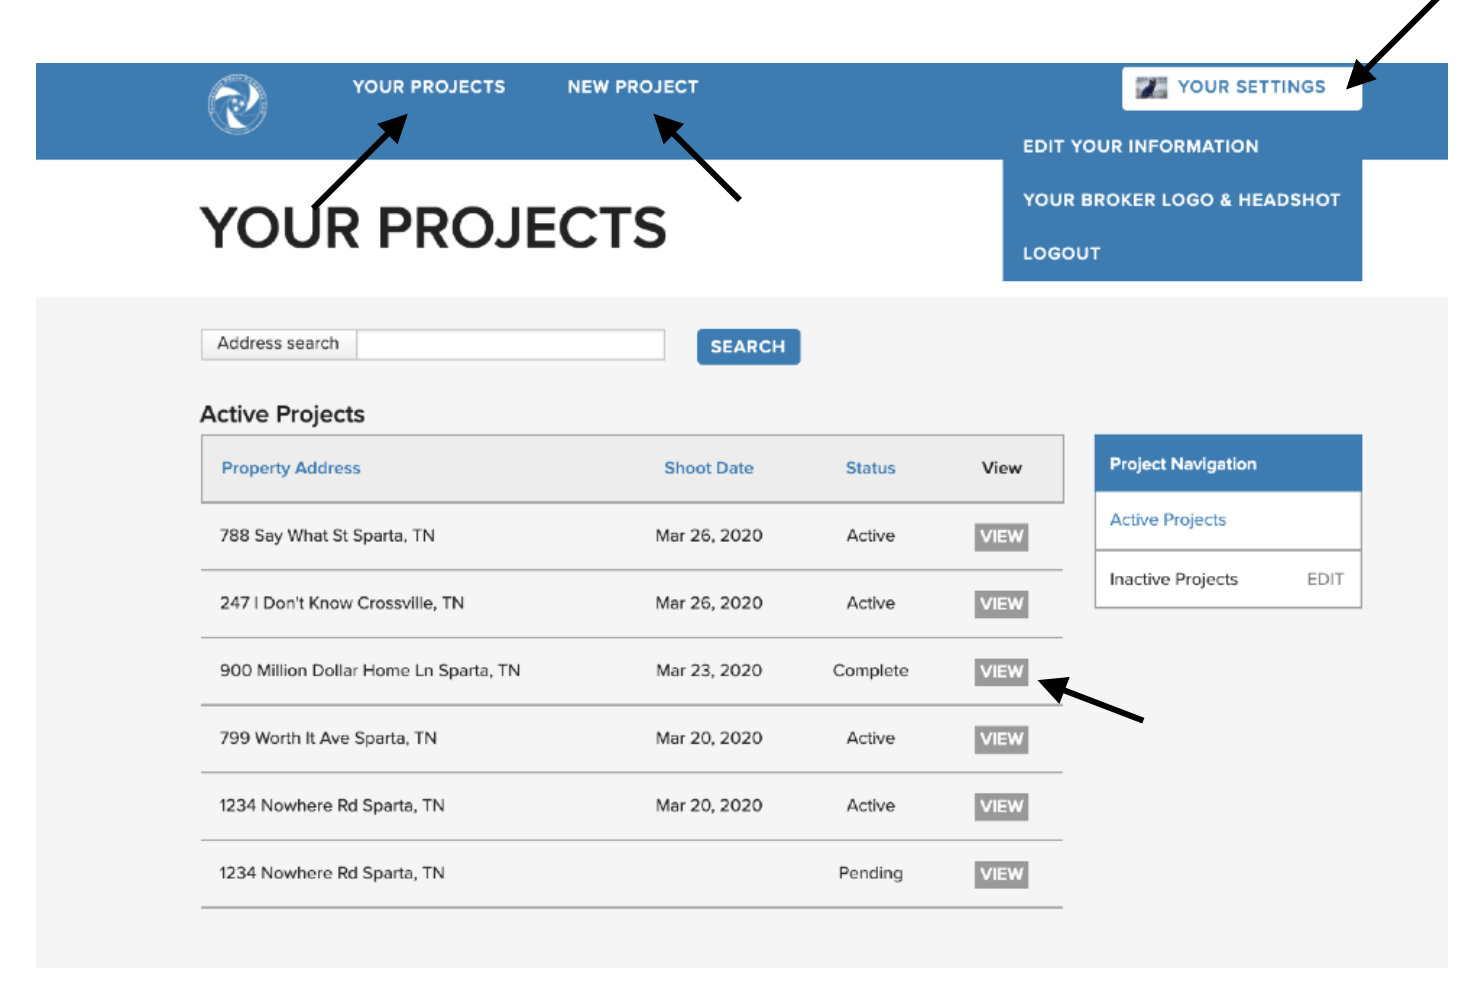
Once you’re logged in, your main screen will show your projects and their status.
Click on Your Settings to update your profile info
Click New Project to request a new job
Click View next to any job to open the job in order to edit the details of the job, or access the photos, videos, links, invoice, etc for the job.
Click Your Projects to return to the screen anytime.

Create a job request
When you click on the New Project button, you’ll be taken to a page where you start by entering all the details on the job that you can. When done, click Save & Continue. As you click Save & Continue you’ll be taken thru a list on the right side of the screen under Your Progress. You can skip any of these at any time and return to them later to finish setting them up.
For DRONE ONLY jobs, just put in “0” for Square Feet since it requires something.

Choose your services
After you enter the property details and click Save & Continue, you’ll be taken package options. The first two are only going to show you the price based on the square footage that you entered for the property. The third package lets you select how many images you’d like to pay to have created. The number of images is for interior images. Don’t worry, normal exterior photos are included also.
Because I can only do three package options, there’s other options not shown here, such as drone only and virtual tour only jobs. To access these, click on GO where it asks if you’d prefer to order Ala Carte instead. This will skip you past the packages and on to Additional Services. See our pricing brochure for a list of services and prices.

Choosing other services
When in the Additional Services options, each both is a dropdown of options. Click on the appropriate Group Option, and then click the check box for each service you require. When done, click Save & Continue.

Choosing a date
After clicking Save & Continue with Additional Services, you’ll be asked for a shoot day and time. This is a build-in feature, but does allow you to let me know either a preferred day and time you want me to aim for, or a point in time in which the property will be ready. In either case, I will still have to receive the request and factor it in with my schedule, the weather, and all other incoming job requests. At which point I’ll communicate with you to confirm the day and time and I will adjust it for you once confirmed.

Submit request
When you get to the Payment & Other section, you’ll see the current total for services for your job based on your selections. This price does not reflect travel if needing to be charged. If applicable, it’ll be added later.
You will need to click to agree to the terms and conditions, and then select Submit Project. At which point your job will be in the system.
Though it does give you the option to pay right away, I generally recommend making payment on the back end of things. Things can happen such as needing to cancel the job, or weather prevents certain parts of the job, or you want to modify your requested services, or something happens on my end and you have to get someone else. Any number of variables can come into play, and so I find it easier to pay after the job is complete rather than risk having to play with refunds.
Email Received
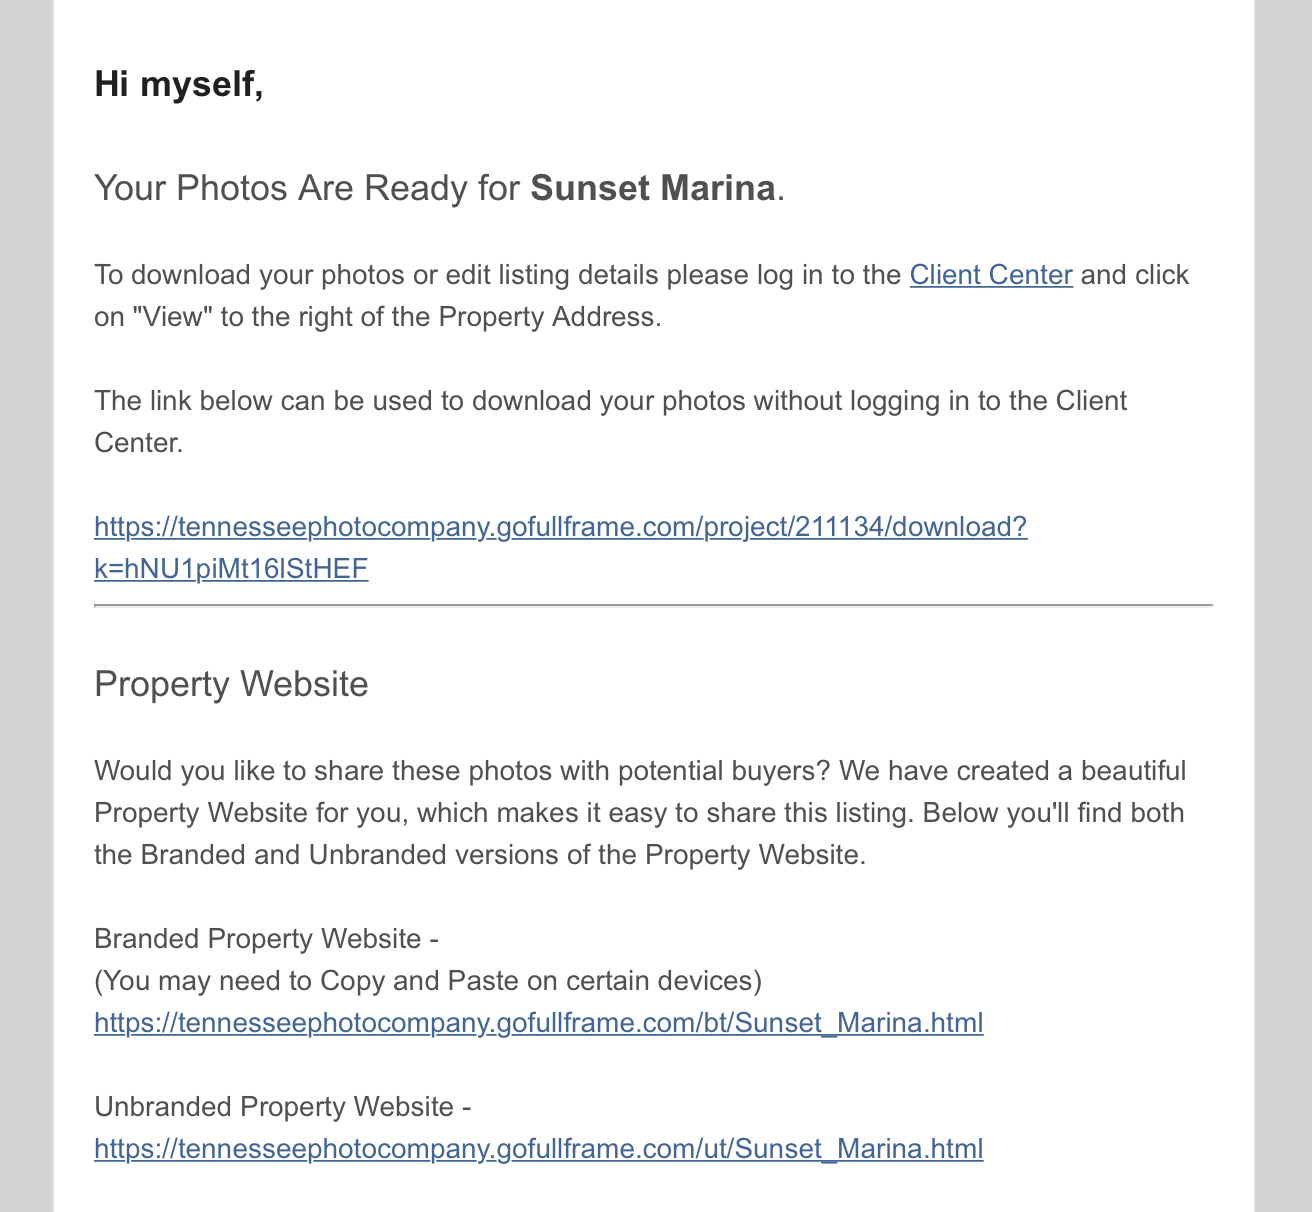
When we complete the job, you will receive an email notifying you that your photos or videos are ready for you. In this email is three different things. The most important is the link in the middle to download your photos. When you click on that link, it’ll take you to a web page to down MLS and/or print sized files. You do not have to log in to do this.
Clicking on Client Center will take you to where you can log in to your profile. From there you can navigate to and download your photos there as well, along with paying your invoice.
Property website links are the last thing. These are stand-alone pages and not intended for downloading. So please don’t click on those and ponder how to download your pictures. Instead I recommend always sending the branded website to your clients to show them their photos for the first time. Plus sharing it on social media.

After job is delivered
After the job is completed, you will receive a email notification that your job is completed. Technically will you see photos and such instantly when they’re uploaded to each job without me having to send a notification. And if all you’re having done is photos, then when you get the email, it will include links to download the MLS files or Printable files right from your email. No more dealing with Box.
What I recommend you do though is login and view the job. Those are the features we’re covering next.

Viewing and Handling Photos, Videos, & Links
When you first click on View Photos & Videos you will see all your photos. From here you can rearrange photos, hide photos (from property website), select your header photo (for your property website, and download photos. There’s also a tutorial video for you as well.

Getting your video files and property website links
From the Category options on the right you can select View/Manage Video. This is where you will get your links for your property websites and download any video files such as drone videos, slideshow videos, etc.

Custom Links
When we do drone videos, Matterport virtual tours, and any other custom link products, you will find them on the Dashboard view for the project. Click on View next to your project, and then scroll down the Custom Links & Deliverables box.

Property Websites
The property websites come free with every job and provide you with both a MLS compliant link and a link that is branded to you with your logo, headshot, contact info, etc. These sites come with statistics that can be monitored and are customizable. When you complete your profile and the property details, they will automatically populate into these websites. Your profile only has to be completed one time and will be applied on every job. If you do not complete these details, they will be missing from these sites. You do not have to use these sites. They are complimentary, but are one extra tool for you to market with and help you look better with your clients by providing something extra (free to you) that other agents (and most photographers) are not providing.

Flyer Builder Tool
If you make use of flyers, this is a fast and easy way to make use of the work that’s already been done so you can have a printable file within a minute of your time. Free to you with every job, and able to be printed anywhere you choose. Simply choose your template. Drag photos over and adjust them to fit. Then download your printable file. That’s it!

Paying your bill
Though I do still accept payment by check, the system does include a secure credit card payment option. One way to access it is to Make A Payment. You can also check the box to save your credit card info so it is conveniently there for you when you need to make payment on your future jobs as well.
Clicking Make A Payment takes you to your Payment option

Updating your profile
If you did not finish your profile, or need to make some changes, you can find the settings in the upper right labeled Your Settings. Mouse over Your Settings and you’ll see a couple options. When done, make sure to save your changes.